1. "Post-processing, Advanced-OpenGL/Framebuffers "
Post-processing
Now that the entire scene is rendered to a single texture we can create some interesting effects simply by manipulating the texture data. In this section we'll show you some of the more popular post-processing effects and how you might create your own with some added creativity.
Let's start with one of the simplest post-processing effects.
Inversion
We have access to each of the colors of the render output so it's not so hard to return the inverse of these colors in the fragment shader. We're taking the color of the screen texture and inverse it by subtracting it from
1.0:
void main()
{
    color = vec4(vec3(1.0 - texture(screenTexture, TexCoords)), 1.0);
}
While inversion is a relatively simple post-processing effect it already creates funky results:
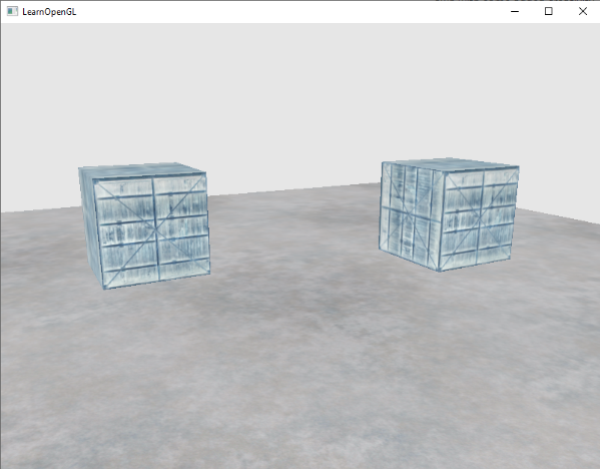
The entire scene now has all its colors inversed with a single line of code in the fragment shader. Pretty cool huh?
Grayscale
Another interesting effect is to remove all colors from the scene except the white, gray and black colors effectively grayscaling the entire image. An easy way to do this is simply by taking all the color components and averaging their results:
void main()
{
    color = texture(screenTexture, TexCoords);
    float average = (color.r + color.g + color.b) / 3.0;
    color = vec4(average, average, average, 1.0);
}
This already creates pretty good results, but the human eye tends to be more sensitive to green colors and the least to blue, so to get the most physically accurate results we'll need to use weighted channels:
void main()
{
    color = texture(screenTexture, TexCoords);
    float average = 0.2126 * color.r + 0.7152 * color.g + 0.0722 * color.b;
    color = vec4(average, average, average, 1.0);
}
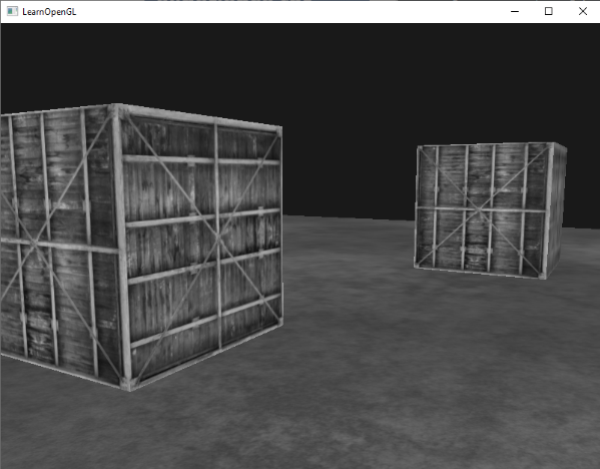
You probably won't notice the difference right away, but with more complicated scenes, such a weighted grayscaling effect tends to be more realistic.
Kernel effects
Another advantage about doing post-processing on a single texture image is that we can actually sample color values from other parts of the texture. We could for example take a small area around the current texture coordinate and sample multiple texture values around the current texture value. We can then create interesting effects by combining them in creative ways.
A kernel (or convolution matrix) is a small matrix-like array of values centered on the current pixel that multiplies surrounding pixel values by its kernel values and adds them all together to form a single value. So basically we're adding a small offset to the texture coordinates in surrounding directions of the current pixel and combine the results based on the kernel. An example of a kernel is given below:
This kernel takes 8 surrounding pixel values and multiplies them by
2 and the current pixel by -15. This example kernel basically multiplies the surrounding pixels by a weight determined in the kernel and balances the result by multiplying the current pixel by a large negative weight.1 if you add all the weights together. If they don't add up to1 it means that the resulting texture color ends brighter or darker than the original texture value.
Kernels are an extremely useful tool for post-processing since they're quite easy to use, experiment with and a lot of examples can be found online. We do have to slightly adapt the fragment shader a bit to actually support kernels. We make the assumption that each kernel we'll be using is a 3x3 kernel (which most kernels are):
const float offset = 1.0 / 300;

void main()
{
    vec2 offsets[9] = vec2[](
        vec2(-offset, offset),  // top-left
        vec2(0.0f,    offset),  // top-center
        vec2(offset,  offset),  // top-right
        vec2(-offset, 0.0f),    // center-left
        vec2(0.0f,    0.0f),    // center-center
        vec2(offset,  0.0f),    // center-right
        vec2(-offset, -offset), // bottom-left
        vec2(0.0f,    -offset), // bottom-center
        vec2(offset,  -offset)  // bottom-right
    );

    float kernel[9] = float[](
        -1, -1, -1,
        -1,  9, -1,
        -1, -1, -1
    );

    vec3 sampleTex[9];
    for(int i = 0; i < 9; i++)
    {
        sampleTex[i] = vec3(texture(screenTexture, TexCoords.st + offsets[i]));
    }
    vec3 col = vec3(0.0);
    for(int i = 0; i < 9; i++)
        col += sampleTex[i] * kernel[i];

    color = vec4(col, 1.0);
}
In the fragment shader we first create an array of 9 sharpen kernel that sharpens each color value by sampling all surrounding pixels in an interesting way. Lastly, we add each offset to the current texture coordinate when sampling and then multiply these texture values with the weighted kernel values that we add together.
vec2 offsets for each surrounding texture coordinate. The offset is simply a constant value that you could customize to your liking. Then we define the kernel, which in this case is a
This particular sharpen kernel looks like this:
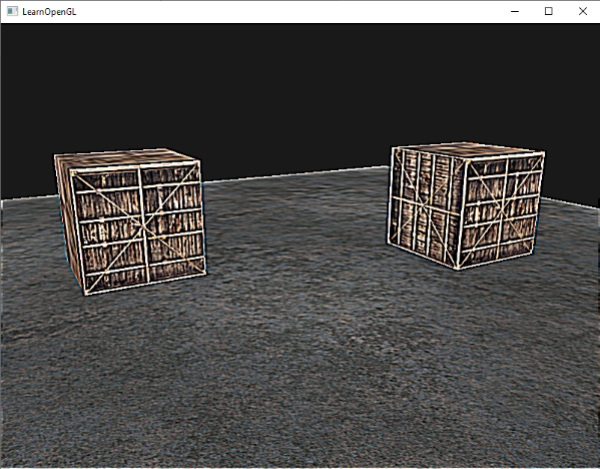
This could create some interesting effects of where your player might be on a narcotic adventure.
Blur
A kernel that creates a blur effect is defined as follows:
Because all values add up to 16, simply returning the combined sampled colors would result in an extremely bright color so we have to divide each value of the kernel by
16. The resulting kernel array would then become:
float kernel[9] = float[](
    1.0 / 16, 2.0 / 16, 1.0 / 16,
    2.0 / 16, 4.0 / 16, 2.0 / 16,
    1.0 / 16, 2.0 / 16, 1.0 / 16
);
By changing the kernel float array in the fragment shader we're completely changing the post-processing effect we're after. It now looks something like this:
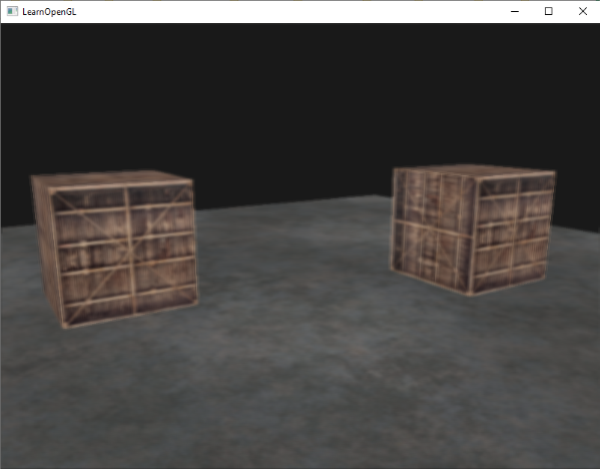
Such a blur effect creates interesting possibilities. We could vary the blur amount over time for example to create the effect of someone being drunk, or increase the blur whenever the main character is not wearing glasses. Blurring also give us a useful utility to smooth color values which we will use in later tutorials.
You can see that once we have such a little kernel implementation in place it is quite easy to create cool post-processing effects. Let's show you a last popular effect to finish this discussion.
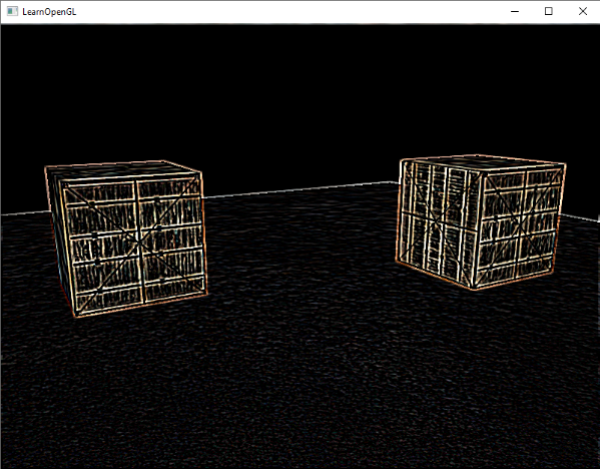
Edge detection
Below you can find an edge-detection kernel that is similar to the sharpen kernel:
This kernel highlights all edges and darkens the rest, which is quite useful when we only care about edges in an image.
It probably does not come as a surprise that kernels like this are used as image-manipulating tools/filters in tools like Photoshop. Because of a graphic card's ability to process fragments with extreme parallel capabilities, we can manipulate images on a per-pixel basis in real-time with relative ease. Image-editing tools therefore tend to use graphics cards more often for image-processing.
No comments:
Post a Comment